If you have large format documents like architectural drawings, blueprints, maps, or historical newspapers that you want to scan, you’ve come to the right place. At SecureScan, we have been scanning oversized documents professionally for more than 23 years. In that time, we’ve learned how to get a perfect image, and we’ve also learned how you can achieve great results on your own, for free, using equipment you probably already have on hand.
While the DIY approach requires a bit more time and patience, it can be a fantastic option if you only have a few documents to scan or just need a digital backup for personal use.
The best method for your project depends on three things: the type of document you have, the equipment available to you, and how you plan to use the final digital file.
- For quick backups or sharing: Your smartphone or a digital camera is surprisingly capable. With the right lighting and a few pro-hacks, you can capture clear, readable images in seconds.
- For higher-detail scans: If you need to preserve fine lines and scale, you can use a standard office scanner and a technique called flatbed stitching, or look into renting/purchasing specialized wide-format equipment.
- For high-quality scanning on a budget: You might be surprised to find that many local libraries or office supply stores offer self-service access to professional-grade scanning equipment for a small fee.
- For high-volume or professional use: If you have a large archive of documents or require precision for engineering and architectural plans, a professional scanning service is your best option. This route takes the labor off your plate and ensures your files are correctly indexed, high-resolution, and ready for professional use in CAD or other technical software.
Below, we have ranked the best ways to scan large documents yourself, starting with the easiest DIY hacks and ending with professional-grade equipment options.
If you’re short on time, the chart below provides a quick overview of the options, or skip to the first method.
| Scanning Method | Pros | Cons |
|---|---|---|
| Smartphone & Scanning Apps | Fastest and most convenient. Modern apps include AI “flattening” and finger-removal features for free. | Potential for perspective distortion; generally not accurate enough for technical scaling or engineering measurements. |
| Digital Camera & Tripod | Higher resolution than phones with less “software smoothing.” Excellent for capturing large, flat artwork or maps. | Requires a specific setup (lighting and tripod) to avoid “barrel distortion” or blurry text. |
| Library / Public Scanners | Access to professional-grade overhead (planetary) scanners for free or a small fee. Safe for fragile items. | Requires travel; availability depends on your local university or library resources. |
| Flatbed Stitching | Highest possible resolution using equipment you already own (home printer). Costs $0. | Very time-consuming; requires manual alignment or specialized software to join “tiles” together seamlessly. |
| Office Supply Stores | Good “middle ground” for standard architectural sizes. Widely available at Staples or Office Depot. | High-speed rollers can be risky for fragile paper or documents with adhesive (tape/post-its). |
| Rent or Buy (For Firms) | Brings professional capacity in-house. Minimal per-scan cost over long periods for businesses. | High upfront investment; requires staff time for scanning, quality control, and manual file organization. |
| Professional Scanning Service | Expert handling, industrial-grade accuracy, and automated file naming (indexing). The only “hands-off” option. | Can be cost-prohibitive for just one or two non-essential documents. |
1. Scan Your Documents with an App
If you are looking for the fastest, most convenient way to digitize a large document for personal use, a smartphone is all you need. Most modern phones have cameras powerful enough to capture an impressive amount of detail, provided you follow a few professional staging tips. There are many dedicated scanning apps available that can help you crop, straighten, and sharpen your images to make this process even easier.
This method is best for: Quick backups, sharing on social media, or making a digital copy for reference purposes.
Our Tips for Scanning Large Format Documents With an App:
- The 45-Degree Lighting Rule: Never use your phone’s flash directly over the document, it creates a white hotspot that can make it difficult to read the text. Instead, place two lamps at 45-degree angles on either side of the paper. This eliminates shadows and glare in the final image.
- Contrast is Key: Place your document on a background that contrasts with the paper (e.g., a white blueprint on a dark wooden table). This helps the app’s auto-cropping feature find the edges of the document.
- The Level-Phone Hack: Most phones have a built-in level or grid feature in the camera settings. When you hold your phone flat over the document, two crosshairs will appear in the center. Align them until they turn yellow; this ensures your phone is perfectly parallel to the paper, preventing that annoying trapezoid-like distortion where the bottom of the page looks wider than the top.
- Use AI Flattening Features: Many modern scanning apps now include AI-powered tools specifically for oversized documents. Look for apps that offer “Curve Correction” (to flatten the look of documents that have been rolled in tubes) or “Finger Removal“ (which digitally erases your hands if you have to hold the edges of a curly document down).
Which Scanning App Should You Choose?
There are dozens of options on the market, each with different strengths. We downloaded and tested every free scanning app we could find to see how they handle different paper types, lighting, and document sizes.
Check out our detailed review of the 10 Best Mobile Scanning Apps.
While these apps are helpful for quick reference, they are limited by your phone’s lens and the software’s ability to flatten the image digitally. For professional engineering or architectural use, the subtle perspective distortion in a mobile scan can make it difficult to take accurate measurements from the file later.
2. Use a Digital Camera and Tripod
If you own a DSLR or a mirrorless camera, you basically have a high-resolution overhead scanner! This method is significantly better than a smartphone because the larger sensor captures more detail and reduces the digital noise you get with a phone camera, making it the perfect DIY choice for capturing documents like blueprints where fine details really matter.
This method is best for: Highly detailed documents, fragile items that can’t be fed through a roller, and large flat artwork.
Pro Tips for Scanning Large Format Documents With a Camera:
- The “Zoom In, Stand Back” Rule: Don’t put your camera 12 inches away from your document. This causes barrel distortion (where flat lines look curved). Instead, use a 50mm lens (or higher), stand 4 to 5 feet away, and zoom in. This flattens the image and keeps your lines straight.
- Use a Tripod: If your tripod has a center column that can flip horizontally, use it! Point the camera straight down at the floor or table. This ensures the lens is perfectly parallel to the document, eliminating perspective issues.
- The Two-Second Timer Trick: Even a tiny vibration from pressing the shutter button can blur fine text. Always use the 2-second self-timer or a remote shutter so the camera is perfectly still when it takes the shot.
3. The Library Hack: Public Scanners
One of the best-kept secrets in the scanning world is that you don’t always have to have your own equipment. Many public libraries, university archives, and makerspaces have high-end, wide-format overhead scanners that are free or very cheap for the public to use.
This method is best for: Getting professional-grade quality for free or only a few dollars.
Pro Tips for Library Scanning Success:
- University Libraries: Many large universities have “Digital Scholarship” labs. Even if you aren’t a student, they will sometimes allow visitors to use their equipment for a small fee.
- Search for Overhead or Cradle Scanners: Often found in university libraries or archives (look for brands like Bookeye), these machines scan from above without ever touching your document. While they are technically designed for books, they can be a secret weapon for DIYers with fragile blueprints or old newspapers that are too delicate to be fed through a traditional roller-based scanner.
- Local History Centers: If you are scanning a historical map or newspaper, your local historical society might have a scanner on-site and be happy to help you preserve a digital copy for their records, too.
4. Office Supply Stores (Staples / Office Depot)
If you don’t want to mess around with tripods or stitching images together with software, a local print shop or big-box office store is a solid middle ground between DIY and professional services.
This method is best for: Standard architectural sizes (24″ x 36″) and people who want a one-and-done digital file without all of the extra effort.
Pro Tips for the Print Shop Method:
- The Roller Warning: Most office supply stores use high-speed roller scanners. If your document has sticky notes, tape, or fragile edges, the machine could chew it up or the tape could gum up their expensive glass. Always remove adhesives before you go.
- Ask for TIFF instead of PDF: Most stores default to PDF. If you plan on editing the document later (like in CAD or Photoshop), ask if they can save it as a TIFF. It’s a lossless format that preserves much more detail than a standard compressed PDF. You can always create a PDF from the TIFF, but you can’t really go the other way around.
- Check the Width, Not the Length: These scanners are limited by the width of the machine (usually 36 or 42 inches), but they can often scan documents that are 10+ feet long. If you have a long “roll” drawing, tell the clerk the width of the short side.
- Call Ahead: Not every location has a wide-format scanner. Some only have standard document feeders that max out at 11 inches wide. Always call and ask for their “wide-format scanning capacity” before you pack up your car and drive over.
- Cost: Expect to pay between $2 and $10 per sheet depending on the size and resolution you need.
- Bring Your Own USB: Some stores charge a “digital transfer fee” to email the file or put it on a cloud drive. Bringing your own thumb drive can sometimes save you $5.00 right off the bat.
5. Scan Long Documents With a Regular Flatbed Scanner
If you have a standard letter-sized flatbed scanner (the kind built into most home printers), you can still scan a large format document. You just have to do it in “tiles” and join them together, a process known as stitching.
This method is best for: High-resolution accuracy on a $0 budget.
Pro Tips for Stitching Scanned Images Together:
- The Overlap Rule: This is the golden rule of stitching. When you move the document to scan the next section, make sure at least 2 or 3 inches of the previous section are still on the glass. If you are using automated software, it needs this redundant data to align the pieces. If you are stitching manually in an editor, this overlap is the only way to ensure your lines (like a road on a map or a wall on a blueprint) perfectly “lock” together without gaps.
- Disable Auto-Exposure: This might be the most important tip. If your scanner’s software is set to “Auto,” it might scan one section slightly darker than the next. This creates “seams” in your final image. Set your exposure and white balance manually so that every tile looks the same.
- Use the Penny Trick: If your document is very plain (like a map with lots of empty white space), the stitching software might get lost. Place a small item like a penny or a scrap of colored paper, near the overlap area. This gives the software a “landmark” to use to align the images.
- The Software Hack: You don’t need any expensive photo editing software. Microsoft ICE is a free and very powerful tool built specifically for this purpose. Many scanners come also come with their own stitch or panorama modes built in that you can try!
- Watch the Orientation: Try to keep the document perfectly square against the edge of the scanner for every pass. Even a 1-degree tilt between tiles makes manual stitching a nightmare, as you’ll have to rotate every single one to get them to line up correctly.
6. Rent or Buy a Large Format Scanner
If you work at an architecture firm, an engineering office, or a historical society with hundreds (or thousands) of documents, the DIY hacks above will probably take too much time. At this stage, your best bet is to bring professional equipment in-house.
This method is best for: High-volume projects, ongoing scanning needs, and firms that need to maintain a growing digital archive.
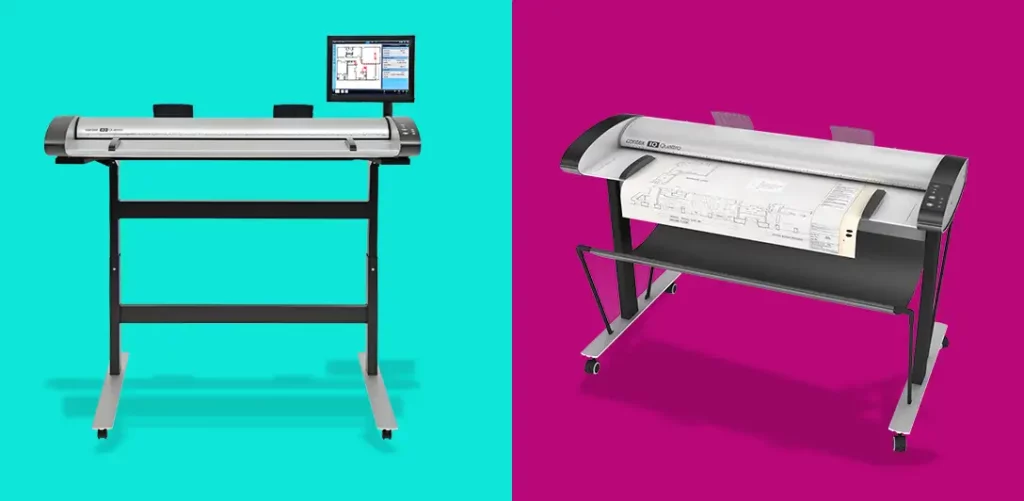
Pro Decision: CIS vs. CCD Scanners
When you start looking at professional wide-format scanners (brands like Contex, Colortrac, or Image Access), you will run into two main types of technology. Choosing the wrong one for your specific paper type is a common and very expensive mistake.
- CIS Scanners (Contact Image Sensor): These are more affordable, compact, and energy-efficient. They are great for flat, crisp technical drawings and blueprints. However, because the sensor sits very close to the glass, they have a shallow depth of field. If your documents are folded or wrinkled, a CIS scanner may struggle to focus on the parts of the paper that aren’t touching the glass perfectly.
- CCD Scanners (Camera-based): These use actual camera lenses and are the gold standard for historical archives, maps, and artwork. They have a much better depth of field, meaning they can stay in focus even if a document is slightly wrinkled or has a textured surface.
Rent or Buy?
- Renting: If you have a one-time backfile of 500 blueprints to digitize, renting a scanner for a month (typically ranging from $300 to $600/month) is often much cheaper than outsourcing your scanning to a professional or buying your own equipment. Most rental companies will even handle the setup and calibration for you.
- Buying: A new, entry-level wide-format scanner starts around $2,000 to $5,000, while high-end CCD models can exceed $15,000. This only makes sense if you plan to scan new documents frequently and have the time to handle the process yourself.
Expert Tip: If you buy or rent, don’t forget the software. High-end scanners often require specialized “Batch Scanning” software to help you name and index your files automatically. Scanning the image is easy; naming 1,000 files so you can actually find them later is the real challenge.
7. Hire a Large Format Scanning Service
Since this is our business, we know exactly where the “DIY line” is. For 90% of people with a few posters or blueprints, the methods we listed above are perfectly acceptable. You’ll save a ton of money, and you’ll get the job done, a win-win for all involved.
However, there are a few specific scenarios where our clients usually decide that the DIY route isn’t worth the risk:
- High Stakes & Accuracy: If you are scanning a site plan to import into CAD for a million-dollar construction project, close enough isn’t good enough. DIY methods (like stitching or photography) often have a 1–3% scale distortion. We use calibrated industrial scanners to ensure the digital file is a 1:1 match with the physical document.
- Brittle Documents: If your documents are so old that they flake when you touch them, DIY rollers or home scanners can be dangerous. We use extra-wide carrier sheets and specialized overhead scanners that capture the image without putting any physical tension on the paper.
- High Volume Situations: If you have 200 blueprints, naming them manually (Project Name, Date, Revision #) could take you weeks. We use automated indexing and OCR to pull that data from the title blocks automatically, greatly reducing the amount of time needed in the process and improving accuracy.
Which Scanning Method is Right For You?
Choosing the scanning method that works best for you comes down to a trade-off between time and precision.
If you have a handful of documents and the patience to experiment, the DIY methods above are excellent for personal archives or quick digital references. We’re big fans of the DIY approach for small projects where a professional service isn’t a necessity.
However, when you are facing a high volume of blueprints, technical drawings, or historical records that require absolute accuracy and searchable indexing, SecureScan can help. For over 23 years, we have been the trusted partner for engineering firms, architects, and specialty businesses that need their archives digitized correctly, at scale, and on time.
Contact us for expert guidance or get a free quote to see how we can take the heavy lifting off your plate.
Appendix: Technical Resources & FAQs
If you’ve decided to tackle your project yourself, there are a few extra technical details that can save you a lot of time and frustration. The information below covers the basics of document sizing, file types, and the common hurdles you might face along the way. While these sections are entirely optional, they are here for anyone who wants a deeper look at the mechanics of a great scan.
Understanding Large Format Document Sizes
Understanding the standard size of your document is important when choosing a DIY scanning method. In the US, most technical drawings fall into two categories: ANSI (Engineering) and ARCH (Architectural).
| Standard Class | Dimensions | Best DIY Strategy | Pro Recommendation |
|---|---|---|---|
| ANSI A / ARCH A | 8.5″ x 11″ to 9″ x 12″ | Standard Flatbed (Single pass) | DIY Friendly |
| ANSI B / ARCH B | 11″ x 17″ to 12″ x 18″ | Large Flatbed or Smartphone App | DIY Friendly |
| ANSI C / ARCH C | 17″ x 22″ to 18″ x 24″ | 2-Tile Stitch or Overhead Scanner | Moderate DIY |
| ANSI D / ARCH D | 22″ x 34″ to 24″ x 36″ | 4-6 Tile Stitch or Camera/Tripod | Difficult DIY |
| ANSI E / ARCH E | 34″ x 44″ to 36″ x 48″ | Smartphone (Low Res) or Camera | Professional Recommended |
Below is a diagram that shows the large format document sizes and how they compare to each other for visual reference:

Common Large Format Documents (And Their Challenges)
Not all large documents are created equal. Depending on what you are scanning, you may run into specific hurdles that a standard document feeder can’t handle.
- Architectural Blueprints: Often printed on thin vellum or diazo paper (the old blue-and-white style). These are extremely light-sensitive and can be especially fragile.
- Topographic Maps: These often feature tiny, 4-point font and thin contour lines. High-resolution (300+ DPI) is non-negotiable here to maintain readability.
- Engineering Schematics: Precision is key. If you use the smartphone method, the slight lens distortion can make a straight pipe or circuit look curved, which can be a major issue for technical planning.
- Newspapers & Posters: These are often highly acidic and brittle. If you try to feed these through a high-speed roller scanner at an office supply store, they are likely to tear or flake.
- Circuit Board Plots: These require the highest level of accuracy (1:1 scale) and are usually the point where DIY methods like stitching fail due to scale drift.
What Makes Large Format Scanning Different?
Scanning an architectural drawing isn’t just about scanning a bigger piece of paper. It introduces three specific technical hurdles that don’t exist with standard office documents:
1. The Memory of the Paper
Standard documents sit flat in a tray. Large format documents have usually been rolled in tubes for years, giving the paper memory. This means they naturally want to curl, spring back, or crease during the scan. If a document isn’t perfectly flat against the sensor, you get blur stripes or ghosting where the image loses focus. Professional wide-format scanners use heavy-duty drive rollers or vacuum-sealed beds to solve this, something a DIY setup struggles to replicate.
2. The Resolution and File Size Trap
While standard scanners max out at 300 or 600 DPI, wide-format scanners can reach 1200 DPI. However, there is a catch: A 36″ x 48″ color map scanned at 600 DPI can result in a file size well over 1GB. Most home computers will lag or crash when trying to open or stitch files of this magnitude. Finding the balance between high detail and a usable file size is a professional skill in itself.
3. Geometric Accuracy and Scale
In a standard office scan, it doesn’t matter if the image is 99% or 100% accurate to the original size. But in engineering, a 1% distortion over a 36-inch span means your measurements will be off by nearly half an inch.
- DIY Risk: Smartphone lenses and stitching software often introduce slight lens distortion (where the image bows at the edges) or alignment shifts.
- Pro Solution: Industrial scanners use calibrated optics to ensure the digital file is a 1:1, pixel-perfect representation of the original plan.
4. Physical Fragility
Large documents are often older, think 50-year-old blueprints or hand-drawn vellum. They are prone to edge-tearing and flaking. Feeding a brittle document through a high-speed roller like those found at most office supply stores can literally shred the original.
DIY Scanning Checklist
Before you commit to scanning a large stack of documents, run a single “test scan” and check it against this list. It’s much easier to fix your setup now than it is to re-scan 50 blueprints later.
- [ ] Check for “Paper Memory”: If your document was rolled, have you flattened the edges with weights? (Watch out for “blur stripes” where the paper lifts off the glass).
- [ ] Test Your Lighting: If using a camera or phone, is the light even? Look for “hot spots” (bright white glares) or dark shadows in the corners.
- [ ] Verify the Resolution: Is it set to at least 300 DPI? Zoom in on the smallest text on your scan if you can’t read the dimensions clearly, you need to increase the resolution.
- [ ] Mind the Overlap: If you are stitching, did you leave a 2-3 inch “landmark” zone so the software can align the pieces?
- [ ] Save Your Master Copy: Did you save the file as a TIFF for your archive and a PDF for easy sharing?
- [ ] Safety First: If the paper is brittle or flaking, stop. Avoid any high-speed rollers that could catch an edge and tear your original.