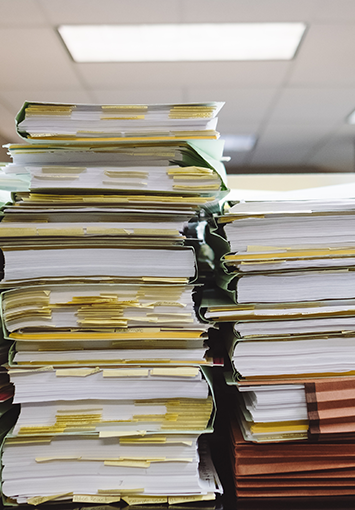
As more organizations lean into the convenience and efficiency of operating paperlessly, document imaging has risen as a pivotal and transformative service for organizations of all shapes and sizes.
Document imaging serves as a bridge to a streamlined, clutter-free way of handling information, allowing businesses with extensive libraries of paper documents to modernize their record keeping systems in one fell swoop.
But what exactly is document imaging? How does it differ from scanning? And how can it be implemented effectively?
In this comprehensive guide, we’ll explore everything you need to know about document imaging and why it’s time to make the digital leap.
What is Document Imaging?
Document imaging is the process of converting paper documents into an archive of digital files, each containing tagged metadata for a more organized collection. These digital files can then be stored, managed, and retrieved electronically.
The primary goal of document imaging is to create an organized and accessible digital archive, reducing the reliance on physical paper and enhancing the efficiency of information retrieval.
Key Features
Rather than simple reproductions of the original documents, the document imaging process includes organization and tagging, making it an essential step in transitioning from physical record keeping to an electronic records management system.
Each digital file can be annotated with metadata tags that include relevant details such as the document type, date, author, or any other pertinent information. This metadata plays a crucial role in how files are cataloged, searched, and retrieved.
Tagging and organization makes your electronic records management system highly adaptable and navigable, allowing users to search for specific content within documents, sort files by various criteria, and access records from remote locations. This level of accessibility and control is a leap from the physical world of record keeping, and it brings significant efficiency to the process.
The Technologies Involved
Utilizing various hardware and software technologies like high resolution scanners, optical character recognition, and specialized imaging software, document imaging ensures accuracy and usability. The captured images are often stored as a PDF or TIFF, enabling easy retrieval, editing, and sharing.
What are the Benefits of Document Imaging?
Gone are the days of leafing through endless files and paper documents searchgooing for the documents you need. Document imaging provides a number of benefits for businesses, including:
Improved Efficiency
Document imaging eliminates the need to sift through physical files, leading to quicker information retrieval and streamlined work processes.
Cost-Effective
By reducing the need for physical storage space and paper supplies, organizations can cut down on overhead expenses. Reducing the time spent sifting through filing cabinets and paper piles to retrieve data saves time, reducing labor costs.
Enhanced Security
Digital documents produced during the document imaging process can be encrypted, password-protected, and access controlled through permissions, providing a higher level of security compared to physical files.
Environmentally Friendly
Working with paper documents day in and day out creates a lot of waste. Eliminating your reliance on paper reduces the environmental impact of your business, contributing to sustainability efforts.
Saving Space
By converting physical documents into digital form, organizations can significantly reduce the need for storage space. This space-saving aspect leads to a more organized work environment and even substantial financial savings in terms of real estate and storage costs.
Improved Disaster Recovery
Document imaging makes disaster recovery much easier for businesses. By digitizing documents, you reduce the risk of physical damage from events such as fires, floods, or other disasters. Digital records can be backed up in multiple locations, ensuring that even if one site is compromised, your data remains safe and accessible.
What is the Difference Between Document Imaging and Scanning?
Scanning is the simple act of converting a physical document into a digital image. It doesn’t include the organization or indexing process that document imaging entails.
Document imaging involves not only scanning, but also the organization, indexing, and storage of digital documents. It’s a holistic approach to transforming and managing information at scale.
The Document Imaging Process
The document imaging process itself can be broken down into these six simple steps:
Step 1: Preparing the Documents
Preparing the documents for the imaging process includes removing staples, smoothing out wrinkles and creases, taping down sticky notes, and ensuring the documents are arranged in the right order.
Each document or group of related documents receives a cover sheet, which contains important tracking information, helping to maintain a high level of organization and accountability throughout the process.
Step 2: Scanning
Several prepared documents are sampled at random for calibration, ensuring that the scanners and their settings are adjusted appropriately for your project. Then, using high-quality commercial scanners, a technician will load and scan your documents in batches, creating an archive of digital images.
Step 3: Image Enhancement
Next, the resulting images are reviewed and adjusted where needed to ensure maximum clarity and readability, such as tweaking the brightness or contrast. When scanning government/historical documents subject to FADGI compliance, this step is omitted.
Step 4: Indexing and Organization
During the indexing process, key identifiers are extracted from your paper documents via OCR or manual data entry, and attached to the corresponding digital files as metadata, enabling text based searches. Files may be grouped by category or document type depending on the clients requirements. This part of the process ensures that it is easy to find any document at a moment’s notice.
Step 5: Quality Assurance
Each document is manually reviewed by a technician to ensure that the digital images accurately reproduce the original document, and that the relevant metadata has been attached. Once approved, documents are added to the file system.
Step 6: Storage and Retrieval
Depending on the clients requirements, there are a number of ways the final images may be delivered.
In many cases, documents are added into an existing document management system so that all records can be accessed from a single place. Otherwise, the final documents may be delivered on an encrypted USB drive or uploaded via SFTP.
Is Document Imaging Accurate?
The accuracy of document imaging is highly dependent on the technology and methods employed. Optical Character Recognition (OCR) technology allows scanned documents to be converted into editable text with high accuracy. However, accuracy can be affected by factors such as the quality of the original document, scanner settings, and software capabilities. Regular quality checks and proper calibration of equipment are essential to maintain accuracy.
At SecureScan, we review every scan to ensure the final digital image accurately represents the original document. Any documents that fail to meet our quality standards are re-scanned with adjustments to the calibration to ensure a 1:1 reproduction.
Apart from reviewing the digital images after scanning, we validate the data extracted from your documents with double blind data validation, resulting in a very high level of accuracy.
What are the Benefits of Hiring a Professional Document Imaging Company?
While the dangers of DIY scanning are well documented, there still may be cases where its appropriate to handle the imaging process on your own.
But in most cases, hiring a professional company to oversee your project offers several advantages that can streamline the process and ensure success.
Expertise in handling complex imaging tasks, adherence to industry standards, and access to advanced technology are just a few of the benefits.
Companies like SecureScan have dedicated teams that specialize in scanning, indexing, quality assurance, and security, ensuring that every aspect of the project is handled with precision and care.
Moreover, we are well-versed in compliance management, mitigating legal risks and ensuring that all document handling aligns with regulatory requirements.
By entrusting your document imaging project to seasoned experts, you not only guarantee the accuracy and quality of your digital files but also free up internal resources, allowing your staff to focus on core business functions.
It’s a strategic investment that can pay off in enhanced efficiency, reduced costs, and peace of mind knowing that your documents are in capable hands.
Problems to Avoid in Document Imaging
Document imaging has revolutionized the way organizations manage and store their information, but like any complex process, it’s not without its pitfalls.
As companies transition from traditional paper-based systems to an electronic system, they must navigate a series of potential challenges that can complicate or even undermine the success of the conversion.
The following section lays out the problems to avoid in document imaging, shedding light on the common mistakes and misconceptions that can hamper the efficiency, security, and effectiveness of this vital process. Inadequate Planning
Failure to plan adequately can lead to disorganization and inefficiencies. Proper planning includes defining the workflow, choosing the right equipment, and training your staff.
Ignoring Compliance
Ignoring legal and regulatory requirements can lead to a legal disaster, especially for businesses who need to scan documents that contain sensitive information. Understanding and adhering to applicable data privacy protection laws is a crucial part of the document imaging process.
Poor Quality Scans
Low-quality scans result in unreadable or distorted images. Ensuring proper scanner settings and regular maintenance can mitigate this issue.
Insufficient Security Measures
Lack of robust security measures can expose sensitive information in your possession to prying eyes, which can cause irreparable damage to your businesses reputation.
For this reason, all scanning projects we complete take place in our secure facility, protected by 24/7 security, badge controlled access, and bank vault-like storage for your documents.
All documents are scanned by HIPAA trained and certified technicians who know how to properly handle and protect sensitive information.
Once digitized, implementing strict access controls, encryption, and regular security audits can make it easy to safeguard your digital files.
Wrapping Up
Document imaging is a powerful tool that enables organizations to operate efficiently and securely.
By understanding its intricacies, benefits, as well as the potential pitfalls, businesses can implement a successful document imaging strategy that truly allows them to thrive in today’s fast-paced world.
Whether you’re just starting out or looking to enhance your existing system, SecureScan can help. We have been helping businesses complete their document imaging projects for more than 22 years and counting.
If you’re ready to start your document imaging project, get a free quote from one of our technicians or contact us for more information.